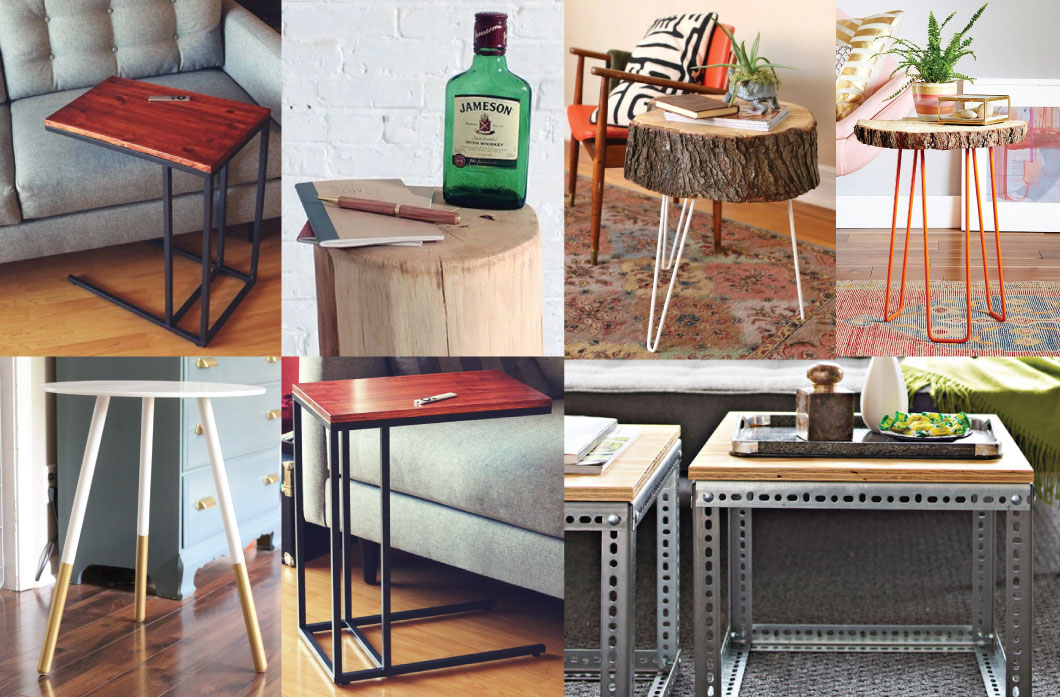
I have curated a list of DIY end table ideas that are easy and cheap to build. Given my love for all things organic and minimalist, these DIY side table ideas will be perfect if you share a similar taste. Although end tables are often an afterthought when furnishing a new space, it is one of the easiest ways to accent your room with flavor and differentiation.
If you’re looking for inspiration or are too lazy to make your own DIY end table, you can always check out our selection of end tables at FROY. But, I digress – without further ado, presenting our top 10 DIY end table projects!

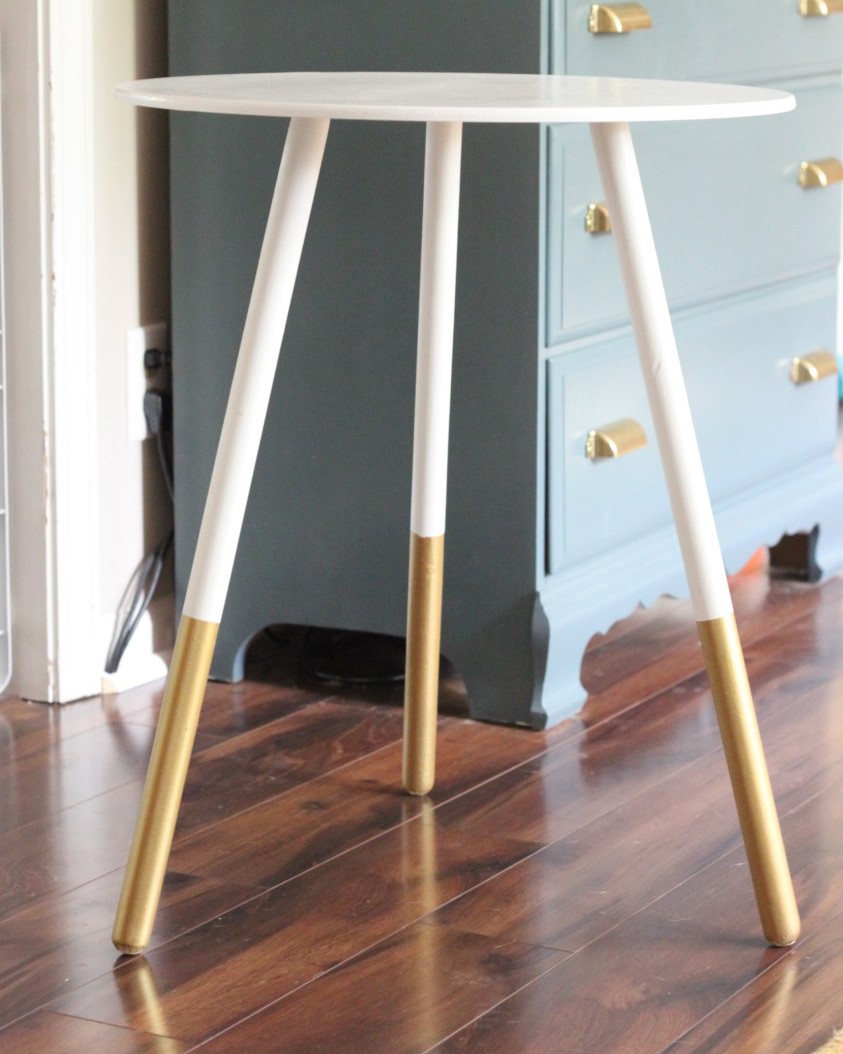
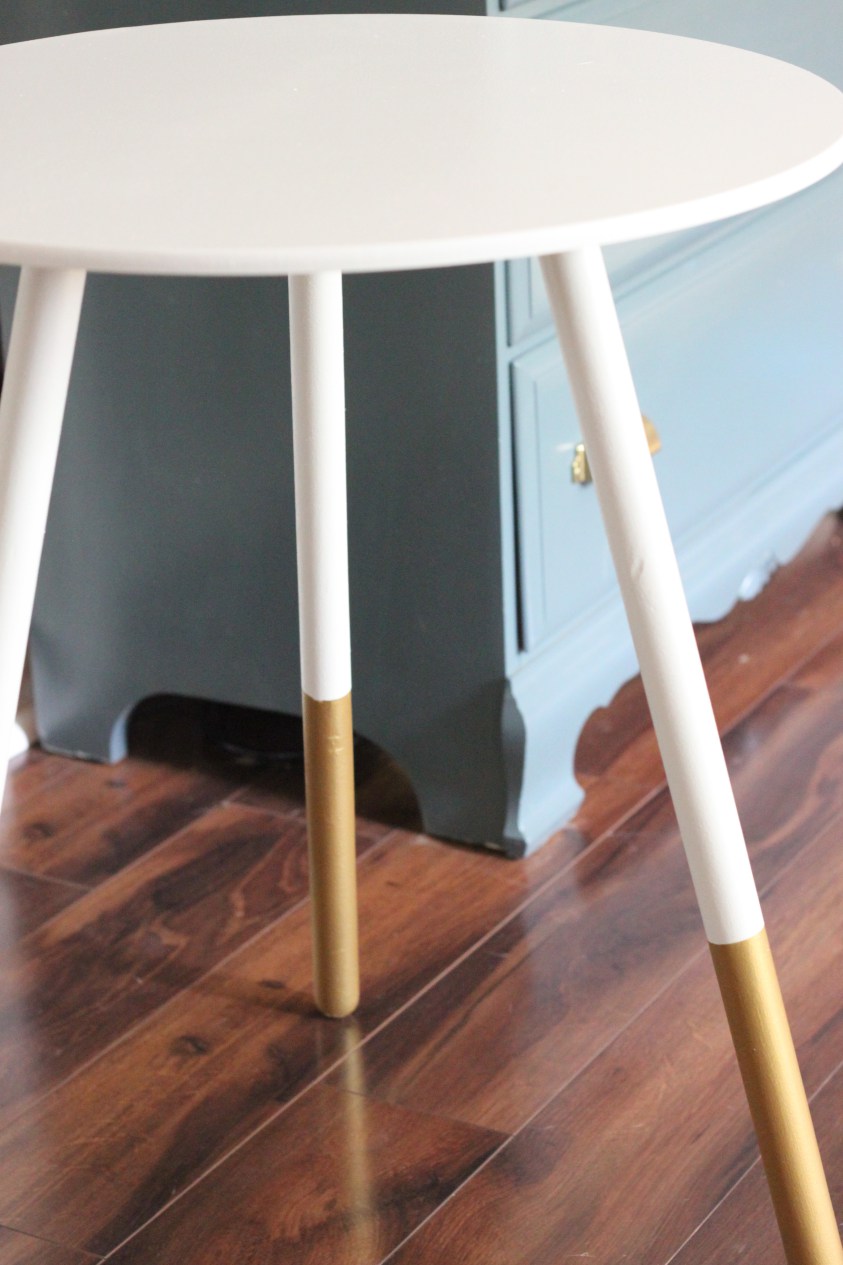
1. Gold-Dipped Tripod End Table
Estimated cost: $15-20; Difficulty: Beyond Easy; Source: Chasing Shiny Objects
Materials:
This DIY end table is super easy and insanely cheap. Just purchase a simple, 20″ round decorator table like this one from BB&B. Feels like cheating? Trust me, even the most rudimentary DIY project won’t be worth the small $9.99 it takes to get started. If you feel a burning desire to customize, try cutting the legs down a bit from its packaged height of 25.5″. Afterwards, go out and get some white and gold paint, painters tape, and paintbrush.
Assembly:
First part is obvious – paint the entirety of your DIY end table in white except around where you would want to transition to the gold dipped portion of the legs.
Next, tape the legs around where you want the gold to stop, preferably around a third of the way from the bottom of the legs. Make sure the tape is tightly and securely on to prevent running when painting the gold layer in the next step. Finally, paint the gold from the bottom of the legs up and just a bit on top of the tape. Applying around 2-3 layers should be sufficient.
As a final touch to your DIY end table, you can apply a layer of polycrylic to protect the wood.
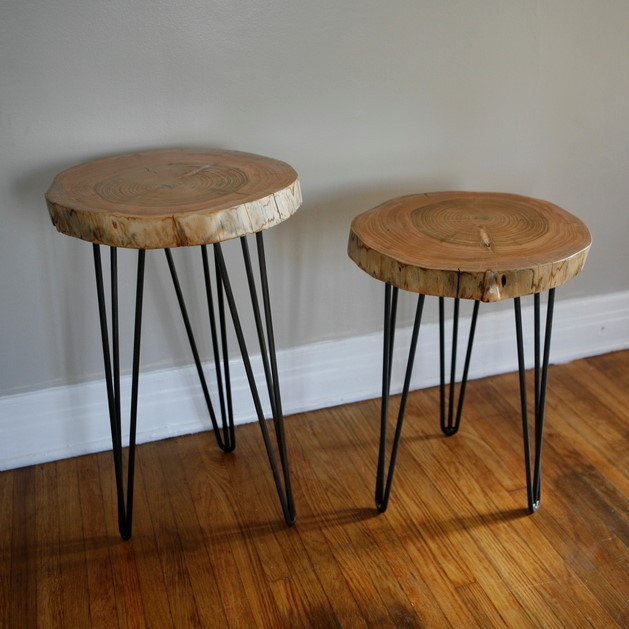
2. Wood Slab On Hairpin Legs End Table
Estimated cost: $75-85; Difficulty: Easy; Source: See Image Details


Materials:
Another easy DIY side table, except this one is a bit pricier and requires minor assembly. You need to find an affordable wood slab, which you can find on Save On Crafts or even Amazon/eBay. You can also try your local cragslist or lumberwork. I would focus on getting a slab that is at least 15″ to 20″. Next, get 3 hairpin legs of any style from Hairpinlegs.com or Hairpin Legs For Less – the cheapest varieties come in just $12 per leg. Keep in mind that your DIY end table should ultimately measure 20″-24″ in height.
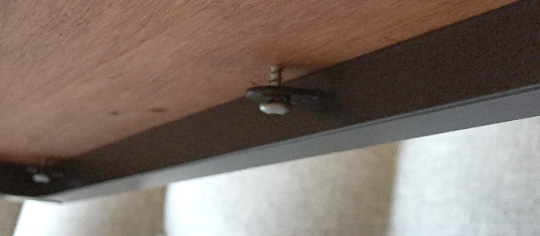
For the screws that attach the legs to the slab, purchase some self-drilling screws from your local hardware store, ensuring that the screws are shorter than the thickness of the slab. Finally, get a drill in order to securely screw your legs in place.
Assembly:
Assembly of this DIY end table is the easiest of all the options on this list. Evenly space the legs on the bottom of your slab and drill the screws. Afterwards, apply a layer of wood stabilizer and oil-based polyurethane finish for protection.
3. Log End Table
Estimated cost: $10 (depends on tools); Difficulty: Moderate; Source: RYOBI


Materials:
Natural all wood log end tables will cost an arm and a leg at designer furniture stores. Try this simple DIY end table project instead for an affordable, stylish solution. If you don’t have a grinder or require a chainsaw, consult your local hardware store like Lowe’s that can help you out. For the log, you can purchase firewood from Craigslist for less than $10. White oak is preferred, but you can pick and choose your favorite.
Assembly:
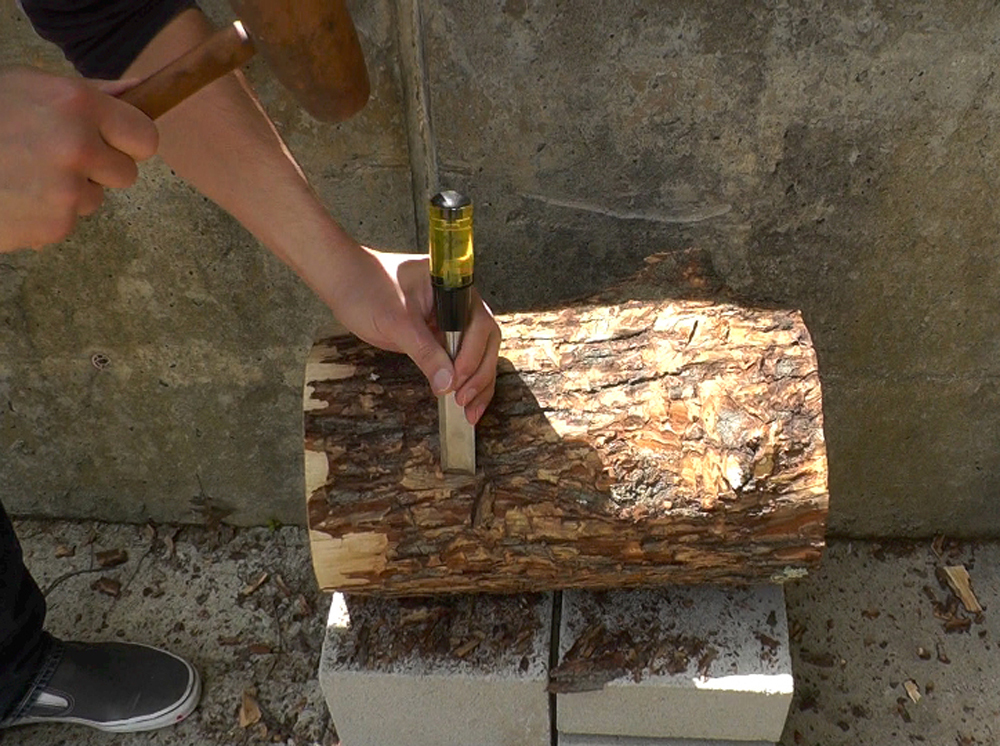

If the log comes uncut, you’ll have to saw off the ends to reasonable flat ends. You’ll also want to saw off any large bumps or branches sticking out from the sides. Next, chip off the barks, perhaps with a hammer and chisel. When the largest chunks have been removed, start using the grinder to smooth out the surface, especially the table top.
To complete and protect the piece, you can apply a polyurethane or acrylic finish for a more glossy look, but try natural wood counter finish made from linseed oil and beeswax for a more organic solution.
4. Industrial Side Table
Estimated cost: $80; Difficulty: Moderate; Source: Lowe’s

Materials:
A staple look, this DIY end table features steel framed base with wooden top. Most of the costs for this industrial table come from the plated slotted angles that form the frame (14 gauge – 1½”×1½”×6′). A cheap $17 copy can be found here at Home Depot, which is cheaper than Lowe’s. You need to buy three of them.
You’ll next have to buy the wooden top, which is recommended to be a 23/32″×2’×2′ sanded pine plywood. Something like this by Lowe’s from your local home improvement store can be had for just $10 or less.
Finally, you’ll need the screws to piece the table together:
- 16 x lock washers (¼”)
- 16 x carriage bolts (¼”× ¾”)
- 16 x hex nuts (¼”- 20)
- 8 x 5/8″ Phillips Pan Tap steel screw
Assembly:
To build the table, start with preparing the steel frames by cutting the three 6′ L-angled steel bars you purchased. Trim 4 x 15″ legs and 8 x 18″ rails. If you don’t have a hacksaw handy, just ask your local hardware store to cut them for you.


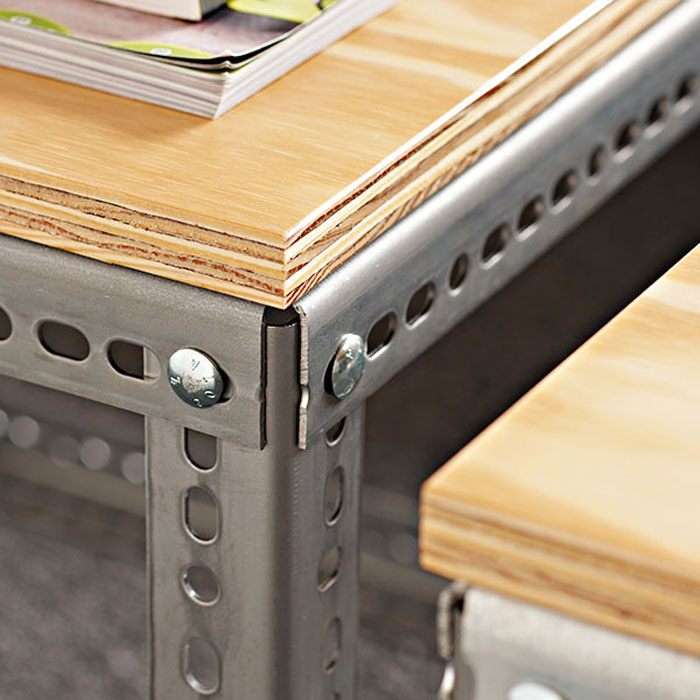
Begin assembly by connecting one 15″ leg to two 18″ rails with bolts, lock washers, and nuts to form a frame corner (see first picture). Make sure to only loosely tighten nuts until all the pieces are attached, then proceed to fully tighten the nuts. The finished frame should appear as a cube.
To prepare the table top, cut an 18-1/2″ x 18-1/2″ piece of plywood. Again, ask your local home improvement store for help if you don’t want to cut it yourself. Sand and finish the wood with polycrylic or polyurethane.
After letting the finish to fully dry, place the plywood face down and flip metal cube frame on top. Attach the cube to the wooden top with the 5/8″ steel screws. Ensure to space out 2 screws per side and screw them through the bracket holes.
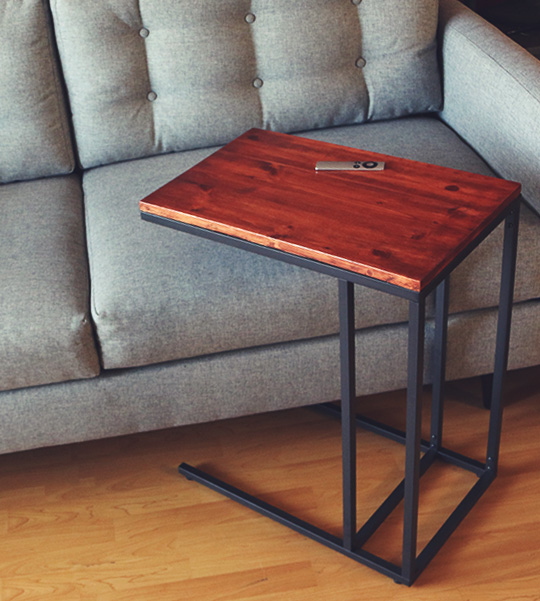
5. Mid-Century Modern C-Shaped End Table
Estimated cost: $60; Difficulty: Moderate; Source: Primer

Materials:
Probably my favorite DIY end table on this list. An equivalent original like the one pictured would cost $300 at West Elm before shipping (even our modernized variant costs $199). So if you’re looking to have some fun and save some money, try this one out by Primer for a chic, stylish look.
This side table is also a pseudo-IKEA hack, since you need to buy the VITTSJO laptop stand to get started (costs $30). The other core component is the 13-3/4” x 21-5/8” wood plank (should cost you no more than $10), which will form the table top. Chances are, you’ll have to buy the smallest wood plank available at your local home improvement store (which will still be huge) and have them cut it for you. You’ll also need 6 screws of less than 1-inch length.
For the finish, you should buy a wood stain – just search for one on Amazon or Home Depot with a walnut color for $5-10. Polyurethane is also recommended for protecting the wood.
In terms of tools, you should have a drill on hand for drilling the holes in the wood and laptop stand. Sand paper (1 rough and 1 fine grain) will also be necessary. You’ll also need a foam brush to apply the polyurethane.
Assembly:
The first step is simple – assemble the IKEA laptop stand except for the glass top. Drill a hole through the frame’s metal tab that is originally designed to support the glass top – this is where your wooden top will be positioned and screwed on. For some extra flavor, you can also elect to paint the steel legs in chic rose gold paint if you want a popular contemporary look.

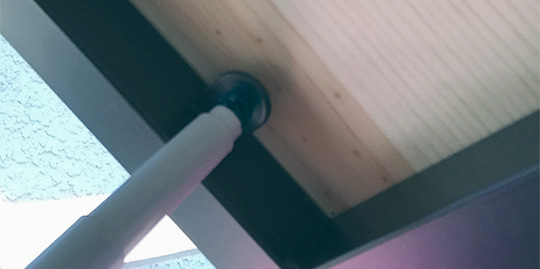
Once the holes are drilled through the metal tabs, place the wooden plank on top. Use a pencil to gently mark an “X” where the holes in the metal tab align with the wooden plank. Next, take off the wooden top and meticulously drill a hole at the location where you made the pencil mark, making sure to avoid drilling too deep.


To really make sure your finished side table looks professional, make sure to sand the wooden top. With the wooden plank still separated from the frame, start off with a rougher sand paper and sand both sides, as well as corners and edges, of the wood. Then, apply a finer sand paper to make sure the wood is smooth and soft. Without sanding, the wood will feel rough and scratchy once the wood stain and protective polyurethane layers are applied.
Use an old t-shirt or rag to apply the walnut wood stain, making sure to apply a consistent layer 2-3 times. The wood can only soak up so much stain, so trying to apply too much will only increase the chance of blotchy looking stains.
After waiting for an hour or so, paint the protective polyurethane layer with the sponge brush, making sure to brush along the direction of the grain. Let the polyurethane dry for an hour, then use a fine-grade sand paper to sand the layer to a smooth finish. Wipe the board of all sanding dust, and repeat painting a new coat and sanding again up to three times.
Finally, combine your wood plank with the steel frame by securely inserting the screws through the holes of the metal tabs into the wood. That’s it – you now have a perfect piece of mid-century modern bracket side table!
That’s A Wrap!
That wraps up my list of favorite DIY end table ideas. As you can see, my emphasis was on selecting end tables that are not only easy to build, but requires minimal materials. Most of the DIY ideas out there require so much wood cutting and materials that the labor required to put them together is worth more than buying a brand new end table. If you have any favorites of your own or completed any projects from this list, please leave a comment!


